
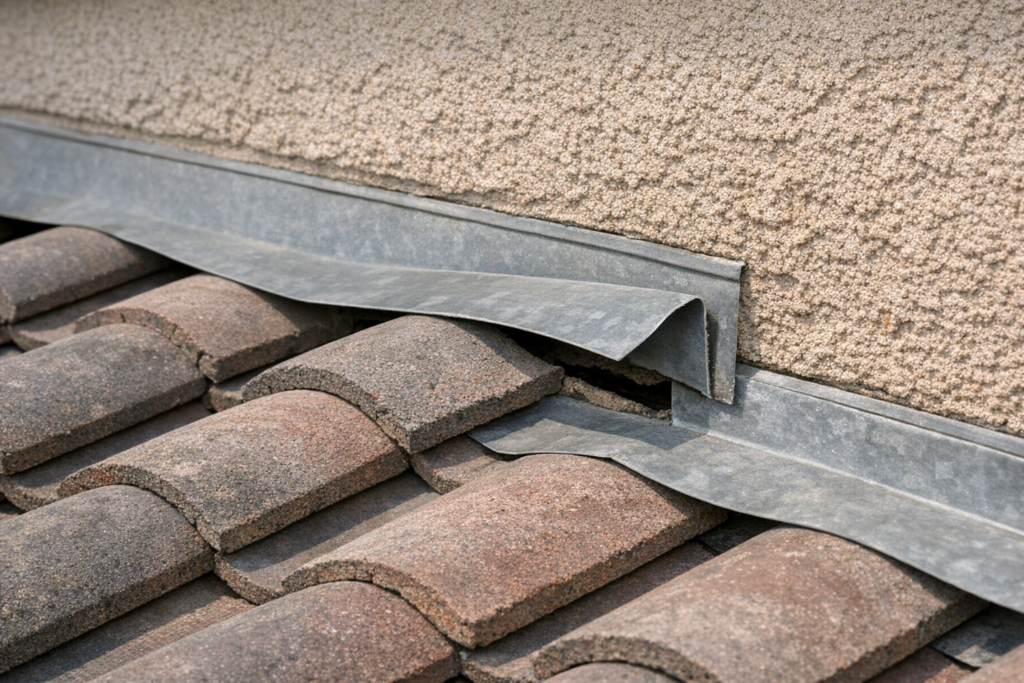
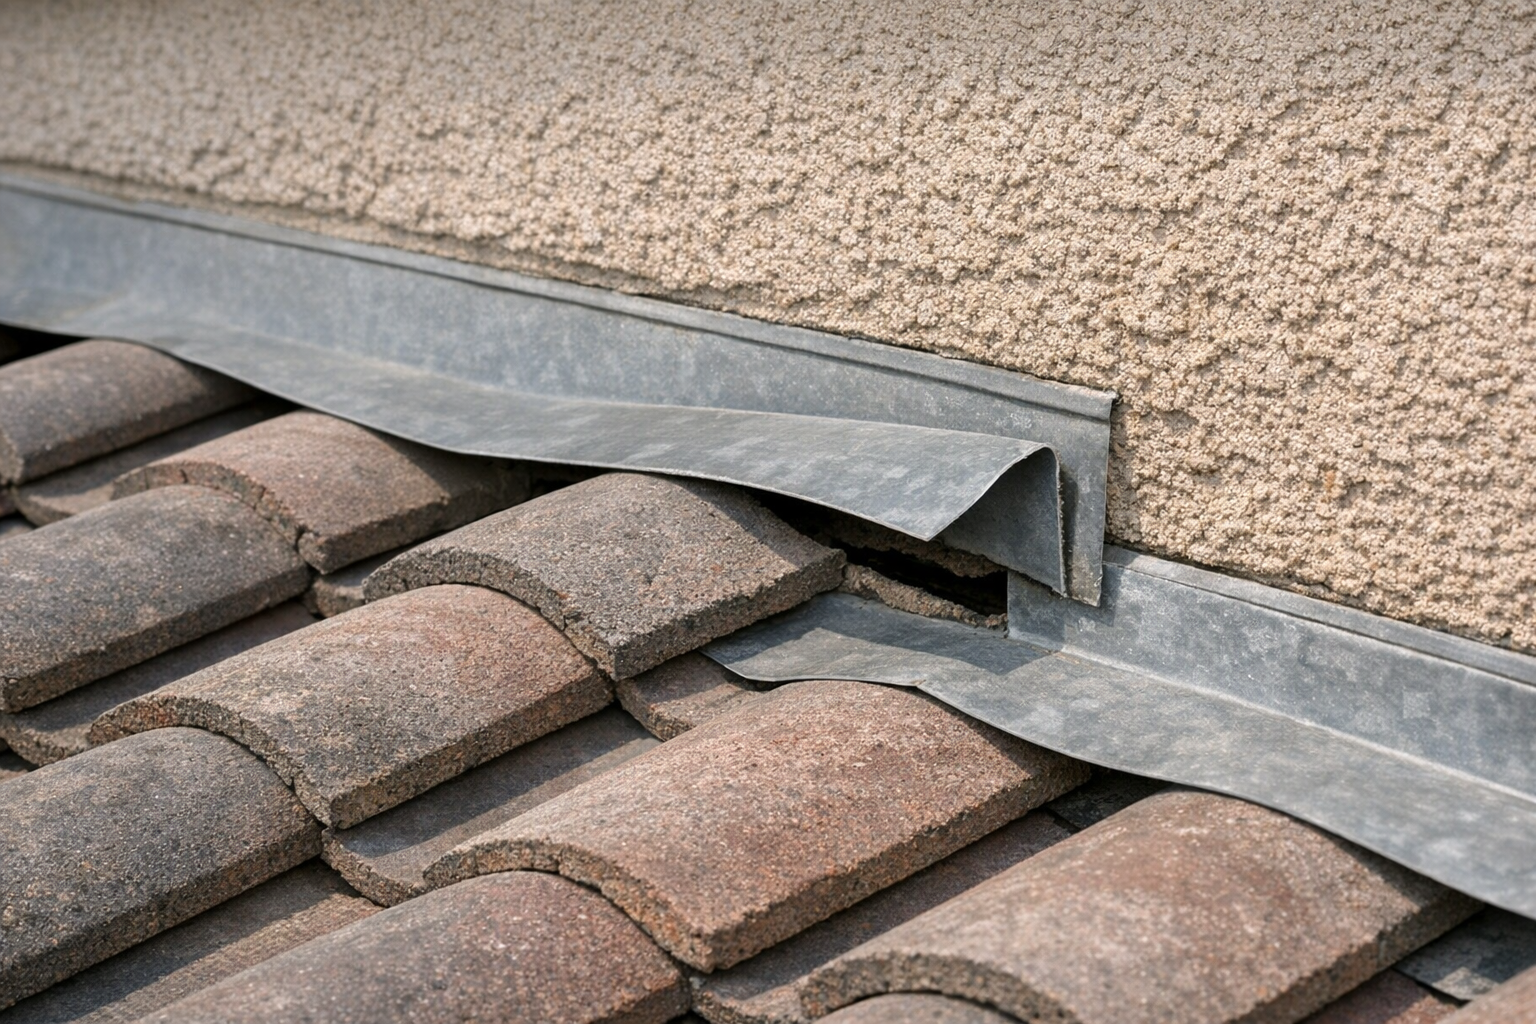
Loose roof flashing may appear as a lifted metal edge, a separated wall joint, or a section that no longer sits evenly against adjoining materials. These observations justify an inspection, but they do not establish where water enters or how much roofing needs repair. For Las Vegas property owners, the useful next step is to document the visible change from a safe location and ask how the flashing connects to the roof beneath it. This guide focuses on roof-to-wall flashing beside concrete or clay tile: what you can observe, what remains hidden, and which answers help separate a targeted repair from unnecessary broader work.
1. Recognizing loose roof flashing without touching it
Flashing directs water through vulnerable transitions where a roof meets a wall, chimney, or other interruption. Along a tile roof wall junction, some metal may be visible while other portions extend beneath tiles or connect behind a wall covering. A visible cover piece and the concealed water-shedding detail are not necessarily the same component.
From the ground or a safely accessible window, look for a newly raised edge, a conspicuous gap, an uneven overlap, or metal that appears displaced relative to adjacent sections. Binoculars or a zoomed photograph can help. Do not lean out of windows, use a ladder for a closer look, or try to test movement yourself.
A straight shadow line is not automatically evidence of failure. Some flashing profiles have intentional bends, clearances, and overlaps. The important distinction is between a designed shape and a change in position, attachment, or weather protection. A photograph showing surrounding roof features gives an inspector more context than an extreme close-up alone.
Ask the professional to identify the visible piece by function: is it base flashing, counterflashing, a termination, or another trim component? Then ask whether its position is normal for that assembly. A roof inspection should turn an observation into a documented finding, not simply label every visible metal edge defective. If the view is obstructed, record that limitation rather than assuming the concealed detail is sound.
2. Building an observation record that helps locate the problem
A useful record connects the exterior concern with timing and interior symptoms. Note when you first noticed the gap and whether it looks different in older photographs. Describe the location using features you can identify safely, such as the wall above a garage or the roof junction visible from a patio. Avoid guessing measurements from distant images.
Inside, document staining, peeling paint, musty odors, or damp finishes in normally accessible rooms. A stain below a wall junction makes that transition worth investigating, but water can travel along roof layers or framing. The closest visible flashing gap may not be the entry point.
- Take one wide photograph showing the roof-to-wall junction.
- Add a zoomed image of the suspected displacement without changing your safe position.
- Record whether an interior mark is new, expanding, dry, or actively wet.
- Describe when symptoms appeared and whether they followed rain or noticeable wind.
- Keep previous repair paperwork and photographs available for comparison.
Do not enter a wet attic, touch damp electrical fixtures, or stand beneath a sagging ceiling to collect evidence. Move away from unsafe areas and seek appropriate professional assistance. For active water entry or visibly unstable material, request prompt assessment rather than waiting to complete a perfect record.
The storm damage observation guide provides additional context for documenting changes after weather. The goal is a clear timeline, not a homeowner diagnosis of the concealed roof assembly.
3. Asking why the flashing moved, not just whether it leaks
Loose flashing is a condition, not a complete explanation. An inspection should investigate what allowed the piece to separate. Possible causes include failed or unsuitable attachment, deterioration around fasteners, movement between adjoining materials, deformed metal, or a previous repair that depended too heavily on exposed sealant. These are possibilities to verify, not conclusions to draw from a photograph.
Las Vegas sun and temperature changes make material movement relevant to the discussion. Metal, wall finishes, and roof materials do not necessarily expand and contract together. Ask whether the installed detail accommodates that movement and whether the proposed repair follows the requirements of the applicable materials and manufacturer guidance.
A bead of cracked sealant may be a symptom rather than the primary failure. If the metal is unsupported or distorted, applying more sealant may leave the underlying movement unresolved. Conversely, a localized failed seal at an otherwise sound detail may not justify replacing every nearby component.
Useful questions include: Which attachment has failed? Is the supporting material sound? Are there elongated holes, corrosion, incompatible materials, or evidence of repeated patching? Can the existing metal retain its intended shape after repair? Ask for photographs that support the explanation.
Where the concern involves a chimney rather than an ordinary wall, the geometry and counterflashing connection require particular attention. The chimney flashing repair information helps frame that separate discussion. The repair recommendation should identify both the affected component and the reason it stopped performing correctly.
4. Understanding what an inspection must check beneath the tiles
On a tile roof, the visible metal edge does not show the entire water path. Tiles shed much of the rainfall, while underlayment and correctly integrated flashing help manage water that reaches beneath them. A wall-junction inspection therefore needs to address both the exposed transition and the concealed connections that can be assessed safely.
Ask whether selective tile removal is necessary to understand the defect. If it is, the contractor should explain the intended area, how tiles will be handled, and whether authorization is needed before opening the assembly. Not every inspection includes invasive investigation, so establish the scope before assuming hidden conditions have been verified.
Questions should cover the condition of adjacent underlayment, overlap direction, wall integration, and any accessible evidence of moisture damage. Ask whether debris is obstructing the intended water path and whether nearby tile placement interferes with the flashing. These details matter more than simply making the metal look flat.
The tile roof repair overview explains why surface tile work and underlying waterproofing are different tasks. If deterioration extends into concealed layers, review the distinction between local repair and tile roof underlayment replacement.
Request a clear statement of inspection limitations. An inaccessible junction or unopened roof section should be described as unverified, not assumed undamaged. Ask what additional findings would change the recommendation and how the contractor would document those findings before expanding the approved work.
5. Deciding between reattachment, flashing replacement and broader work
A focused repair may be reasonable when the affected section is limited, the metal remains serviceable, and the surrounding roof and wall connections can be restored reliably. Depending on the assembly, that could involve correcting attachment, resetting a displaced component, or rebuilding a localized overlap. The method must address the cause rather than merely cover the visible gap.
Replacing the flashing section becomes more persuasive when metal is torn, substantially corroded, permanently distorted, or configured so that proper overlaps cannot be restored. Ask how replacement metal will connect to retained sections and whether adjacent tiles or wall finishes must be temporarily removed. A durable transition depends on those connections.
Broader roof work requires broader evidence. Deteriorated underlayment across multiple areas, damaged supporting materials, or recurring failures beyond the original junction can change the project scope. One loose piece alone does not demonstrate that the entire roof needs replacement.
Compare a proposed roof repair with broader work by asking what each option fixes, what it leaves untouched, and what uncertainty remains. If roof replacement is recommended, request photographs and a condition-based explanation that extends beyond the isolated flashing defect.
Also distinguish temporary protection from completed repair. A temporary measure may reduce immediate exposure while access or materials are arranged, but its limitations should be written down. Ask what work remains, which conditions require faster follow-up, and how the final repair will restore the intended water-shedding detail.
6. Comparing estimates by scope rather than the visible gap
The size of a visible opening is a poor predictor of repair cost. A short flashing section can require careful tile removal, wall access, custom metal fabrication, or replacement of deteriorated material beneath it. A longer accessible section may involve less disruption. Without examining the assembly, a confident price can hide important exclusions.
A useful estimate identifies the location and component, the proposed repair method, and the materials included. It should explain whether tile handling, replacement of damaged tiles, underlayment tie-ins, wall-finish restoration, debris removal, and final documentation are included or excluded. Ask who is responsible for related work outside the roofing scope.
- Will the existing flashing be reused, modified, or replaced?
- What concealed conditions could trigger additional work?
- How will additional findings be photographed and approved?
- Which finish repairs are excluded from the proposal?
- What workmanship coverage applies, and what limitations are written into it?
If a ceiling stain is part of the concern, ask whether the proposal includes leak-source investigation or only repairs the visible metal. The roof leak repair guide explains why tracing entry matters before selecting a repair location.
Compare proposals against the same observed defect and access assumptions. A cheaper sealant-only scope and a detail-rebuilding scope are not equivalent products. Ask each contractor to explain why the proposed work is sufficient, rather than treating the lowest total or largest project as automatically preferable.
7. Planning follow-up around the repaired assembly
Maintenance planning begins with the completed repair record. Keep photographs of the finished flashing, the written scope, any concealed conditions discovered, and the materials used where provided. These records help distinguish a new problem from an unchanged architectural detail during future observations.
Ask the contractor what normal movement or appearance to expect at that specific junction. A designed clearance should not be mistaken for a fresh separation. Equally, a newly lifted edge, loose material, or recurring interior stain should not be dismissed because the area was recently repaired.
There is no single maintenance interval suitable for every flashing assembly. Follow guidance appropriate to the installed roof system, material manufacturer, observed condition, and repair requirements. Access limitations and previous leaks may also affect the professional follow-up plan. Ask which observations should prompt contact sooner than the planned review.
From safe locations, compare the same view over time rather than searching for tiny changes across the entire roof. After an event that produces visible damage, document what changed and request assessment as appropriate. Do not press metal into place, add household caulk, or disturb tiles to check whether the repair held.
A tailored roof maintenance plan should address the actual assembly instead of promising that routine sealant application solves every transition. If staining returns, note the timing and request a fresh evaluation. The original repair may need review, but another source may also be involved; the evidence should guide that distinction before further work is approved.
8. Frequently asked questions about loose flashing
Can flashing be loose even if the ceiling is dry?
Yes. A displaced component can create vulnerability before an interior symptom appears. Other roof layers may temporarily limit water entry, or rain may not yet have reached the junction under conditions that expose the defect. A dry ceiling does not confirm that the flashing is properly attached or integrated.
Does a visible gap always mean the flashing has failed?
No. Some profiles include intentional clearances, bends, and overlaps. A professional needs to distinguish the designed detail from displacement or separation. Ask what comparison supports the finding: neighboring sections, the installed system requirements, attachment condition, or accessible evidence beneath the visible edge.
Is adding sealant enough to repair the problem?
Sometimes a compatible sealant is part of a correct repair, but it cannot automatically replace attachment, sound metal, or proper overlaps. Ask what role the sealant serves and whether the assembly would still direct water correctly if the exposed bead eventually deteriorates. The answer should fit the installed detail.
Will the inspector need to remove roof tiles?
Possibly. Some attachment and water-path questions cannot be answered from the surface. Ask whether selective removal is included, what limitations remain without it, and how permission for additional investigation is handled. A surface inspection should not be described as confirmation of concealed underlayment condition.
What should I send when requesting an inspection?
Provide your property address, a safe wide-view photograph, a closer image if available, the observation date, and any interior symptoms. Include prior repair information and access constraints. State whether water is actively entering or material appears unstable so the request can be assessed appropriately without relying on an image alone.
Concerned about a lifted flashing edge on your Las Vegas tile roof? Share what you can safely see with Presto Roofing LV and ask for an inspection focused on the attachment, concealed connections, and repair options. Use the contact page to describe the concern, or call 702-867-0187 to discuss the next step for your property.